Visualizzazione post con etichetta tutorial. Mostra tutti i post

venerdì 15 marzo 2013

Tutorial - Crown and Crown Cake (english version)

Tutorial - Korona i Tort Korona


Create your own personal patern using Wilton Baroque Mlod.
Then measure one section.
My section was 9cm (3,543") large and 12cm (4,724") high (5,5cm (2,165")belt and 6,5cm (2,559")"lace") more or less.


Somme mathemetics:
O x II = P (perimeter) => O = P (perimeter) / II
Now if you want to make just e crown you need only 5 section.
5 section x 9cm (3,543") = 45cm (1'5,717") perimeter => o 14,32cm (5,638")

If You want to make crown cake You need:
8 section x 9cm (3,543") = 72cm (2'4,346") perimeter => o 22,92cm (9,024")
9 section x 9cm (3,543") = 81cm (2'7,89") perimeter => o 25,78cm (10,15")
Remember that if You are making a Crown Cake your pillow must be 2cm (0,787") smaller than crown!!!

Now just choos wat You want to do!
I decided to make a Crown Cake with 9 section,
so I asked my local cake supplies store to cut for me a dummy cake 12cm (4,724") high and o 25,78cm (10,15").
If You can't find so high dummy You can glue two or three togheder to rich height as You want.


Now sign on dummy high of the strip 5,5cm (2,165") and using protractor divide Your perimeter in 9 section.
360° / 9 section = 40° for each section
Divide each section in a half just to mark center of each section using diffrent pencil color or a dashed line as it is shown on photo.
Pin a plastic foil around dummy to prevent that your gum paste or royal icin attached to dummy.
Cut fondant strip 5,5cm (2,165") high and 81cm (2'7,89")long.
Put in arround dummy, glue ends with royal icing and pin it to dummy.


Using Wilton Baroque Mlod make all pieces for one section,
then starting from bottom to top glue them one at a time and pin them to the dummy.
Do not glue fondant pieces to plastic foil, but between them!!!


When You finished all section start to decorate a strip.
I don't have gem or jewelry molds so I used a samll daisy mold insted.
To make little pearls I used Wilton Baroque Mlod (stripe with small pearls) but I cutt out edges.
Make all pieces for whole strip and glue them one at a time to the strip using royal icing and pin them to the dummy. Seat a side to dry.


Paint all pearls with pearl dust mixed with alcool, and then a whole crown with gold paint.
Be carefull becouse liquid paint can softener your crown!
Seat a side to dry.


Insert a long screw at the center of dummy and then pull out dummy and take out plastic foil.
Be very carefull! Be sure that Your crown is very dry!
Paint with gold pait your crown inside.
In this step I recomended to use only spray gold paint becouse it dry insted.


I left my crown to dry for whole night and the day after in the morning I saw this....
After almost 11 hours of hard work my crown was destroyed by humid...
I took all pieces and in 15 minutes I stick them once again and I left it to dry once again...
 
The next day I insert my cake inside crown and my crown cake was finaly finished!!!
Happy 39th Birthday to me!!!


venerdì 20 luglio 2012

How To Make Red Hearts Inside The Cake (english version)


In a last few days I saw on this web site a lot of different cake insert techniques which I liked very much. So I invented my own! It is very easy and simple, you don’t have to use any complicated tools. I used this techniques when I made a cake for my husband for our 4th wedding anniversary, and he was very moved when he saw surprise inside the cake. I hope you will like it as much as I do!

LIST OF MATERIALS AND TOOLS
·         Rectangular pan for chocolate mud cake. I used 8 ¾’ x 12’ (21 x 30cm)
·         Two or more empty bean’s can*, the higher the better. I used Ø 2 ¾’ x 4’ (Ø7 x 10cm)
·         Little hacksaw for metal.
·         Sandpaper
·         Sharp knife
·         Backing sheets / backing paper
·         Chocolate mud cake
·         Red velvet or other red color cake
·         A lot of white filling. I used cheese cream filling.

  
 HOW TO DO IT
Cut out protruding edge of cans, then smooth the edge with sandpaper.
If yours can are smooth just skip out this step.

 
*CAN PROBLEM 
Some people ask me if  the cans are food safe to baked in a cake?
Honestly I don't know... But as you can see on the 1st photo inside my bean's can there's only a little white strip of white plastic (?) and any way to protect my cake from can's walls I put inside a baking paper. I guarantee that there wasn't any fumes when cake was baking, there wasn't any chemical odor or any chemical taste of my cake. And after baking the white plastic strip was intact. 
I discover that there are many different cans with different interior. Some of them have only one white strip and some of them are cover all over inside with white plastic (?).
Please be careful when you choose the right can to do this cake!
 

Put round piece of backing paper on the bottom inside each of cans and another one around the walls. Make sure that the paper is much more high than the can. This prevent that cake run out of the can in case it grow up too much (Photo 2).


 Bake chocolate mud cake in rectangular pan and red velvet in bean’s cans. Them let them cool.


Cut chocolate mud cake in two thin layers.
With sharp knife cut along each of red cylinders in four quarter.


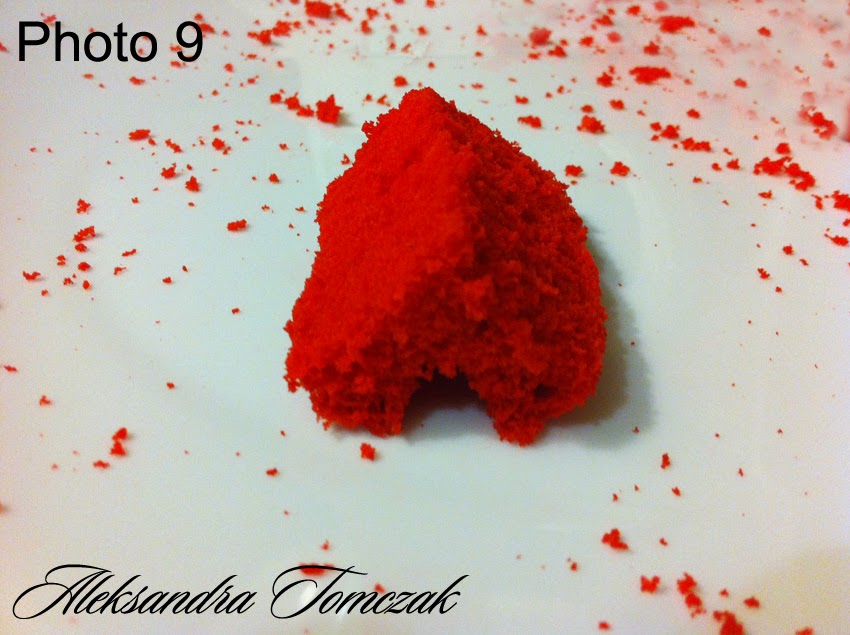
Cut out along each quarter a triangle piece of cake.


When you watch your red cylinder on the top you have to cut it as it show on Photo 6.
Can you see four red hearts?


Put inside of rectangular backing pan first chocolate mud cake layer with the smooth surface down.
 

Put a thin layer of filling.


Put red hearts UP SIDE DOWN on filling and press gently.


Cover with a rest of filling and put on the top the second layer of chocolate mud cake.
Upss! I forgot to make a photo of this two steps…
Cover cake pan with cake board (Photo 11) and put the cake in refrigerator for a few hours.


Take the cake out from the refrigerator and TURN IT UP SIDE DOWN!
Now hearts inside the cake are in the right position!
Cover cake with icing and fondant as you wish and it is done!


This is how the cake looked when I cut it!